
Last Updated: November 19, 2026
Quick Summary
Surveyors check for damp using a moisture meter as the first screening tool, then confirm findings with thermal imaging, a thermo-hygrometer and a careful visual inspection. No single device proves a damp problem on its own, so readings are taken in a pattern and backed by a second method before any conclusion is drawn. A damp survey should be carried out to British Standards (BS6576) and PAS 2030 using a whole house approach.
- A pin-type meter drives pins into plaster and timber to measure electrical resistance.
- A non-invasive meter scans walls without drilling or leaving marks.
- Thermal imaging cameras reveal cold surfaces and hidden moisture patterns.
- Readings that climb towards the floor on a ground-floor wall are consistent with rising damp.
- A single high reading on a chimney breast is a common false positive.
Table of Contents
- What Surveyors Use to Check for Damp: The Full Toolkit
- Damp Meter Readings Explained
- The Limitations of Moisture Meters
- Condensation Versus Damp: Telling Them Apart
- What a Surveyor Checks Outside the Property
- A Damp Survey: What to Expect and How to Prepare
- What the Findings Mean and What to Do Next
- Book a Free Damp and Energy Efficiency Survey
- Frequently Asked Questions
What Surveyors Use to Check for Damp: The Full Toolkit
Surveyors check for damp using a moisture meter as the first screening tool, then confirm findings with thermal imaging, a thermo-hygrometer and a careful visual inspection. No single device proves a damp problem on its own.
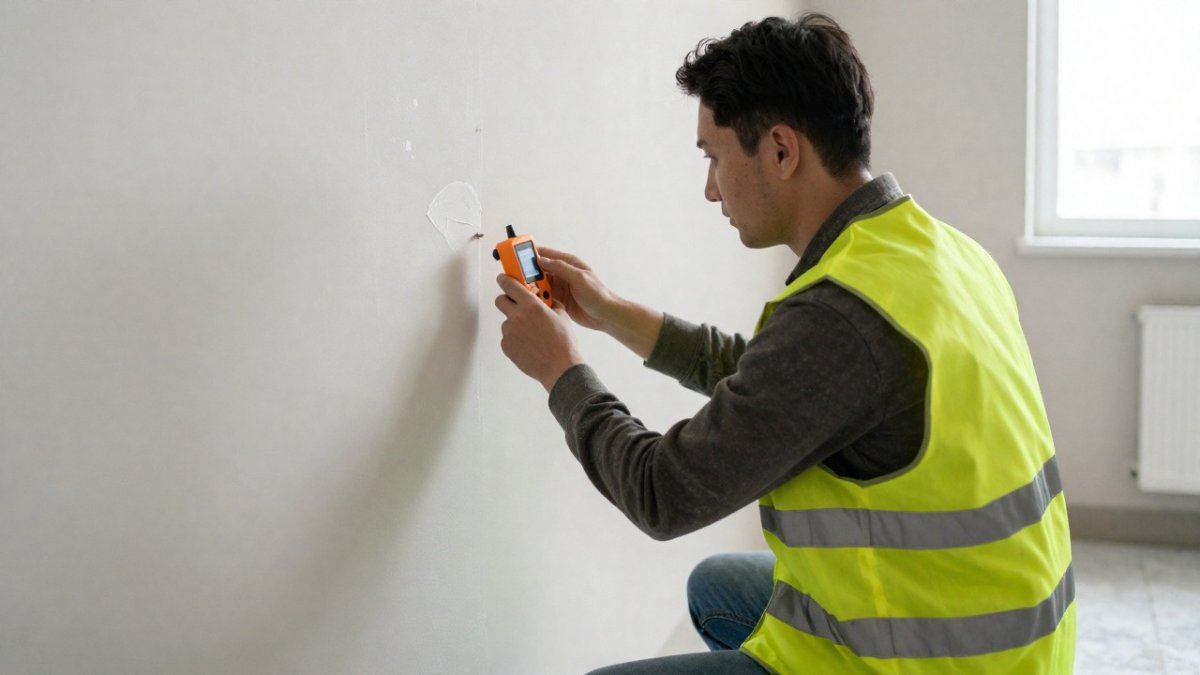
At Home Energy Save GB, we offer free damp and energy efficiency surveys. The principle behind any damp survey is simple: measure, then confirm.
Here is the full kit a surveyor brings through your door:
- Pin-type moisture meter for direct readings in timber and plaster
- Non-invasive meter for scanning walls without drilling
- Thermal imaging camera to spot cold surfaces and hidden moisture
Pin-type and non-invasive moisture meters
A pin-type meter drives two small pins into the material and measures electrical resistance. Wet plaster and timber conduct electricity better than dry ones, so lower resistance means higher moisture content.
A non-invasive meter sends a signal into the wall without touching it. It is faster and leaves no marks. It is also easier to misread.
Surveyors commonly use both. The non-invasive meter finds the suspect area. The pin-type meter confirms it.
Thermal imaging and thermo-hygrometers
A thermal imaging camera shows surface temperature differences. Damp patches often look colder than dry walls. The camera makes hidden moisture visible without opening anything up.
A thermo-hygrometer measures relative humidity and air temperature. This tells the surveyor whether the air in your home is holding too much moisture.
Here is the kit a surveyor brings through your door, and what each tool is for.
Tool | What it does |
|---|---|
Pin-type moisture meter | Direct readings in timber and plaster |
Non-invasive meter | Scans walls without drilling or marks |
Thermal imaging camera | Spots cold surfaces and hidden moisture |
Thermo-hygrometer | Measures air humidity and temperature |
Eyes and a torch | Finds water staining, tide marks and salts |
Damp Meter Readings Explained
A damp meter reading is an electrical measurement, not a moisture percentage. The instrument passes a small current through the material and converts the resistance into a scale, commonly marked dry, borderline or damp, or expressed as a relative figure from 0 to 100. The number tells the surveyor where to look harder. It does not tell them what is wrong.
What the pattern of readings can suggest:
- Consistently low readings across a wall indicate the plaster and substrate are dry at the points tested
- Readings that climb towards the floor on a ground-floor wall are consistent with rising damp, though salts and hygroscopic plaster can produce the same profile
- Patchy high readings at a single height or around a window reveal often point to a leak or penetrating damp
What a reading can and cannot prove
A meter reading is screening evidence. It can show that a material is electrically conductive enough to warrant closer inspection. It cannot, on its own, establish:
- The source of the water, a high reading does not distinguish rising damp from a leaking pipe, a bridged damp proof course or condensation
- The severity of the problem, resistance responds to salt content as well as water, so a salty wall can read high while being dry
- How long the issue has existed, the meter has no memory and no clock
This is why a surveyor takes a series of readings rather than a single spot check, and why the pattern across a wall, a floor and a ceiling matters more than any one number.
Why readings mislead
Several common conditions produce falsely high readings:
- Plaster containing hygroscopic salts, often left behind by an old rising damp problem or by long-term evaporation
- Foil-backed wallpaper, metallic paints and metal fixings, which distort the signal
- Fresh paint, recent cleaning or high surface moisture from condensation
Watch out: a single high reading on a chimney breast or an external corner is one of the most common false positives in damp surveying, salts from an old flue or a cold bridge can mimic damp without any water ingress at all.
How readings fit the inspection sequence
In practice, a surveyor works in a deliberate order. Visual inspection comes first: water staining, tide marks, blistering paint, dark skirting boards, musty odour and visible mould. Only then are meter readings taken, and they are taken in a grid or along a line rather than at random, so the pattern can be compared.
That sequence is what separates a survey from a spot check. The reading is a question, not an answer.
The Limitations of Moisture Meters
Moisture meters are a screening tool, not a diagnosis. This is the part most guides skip.
A meter cannot tell you the source of the water. It cannot tell you whether damp is rising, penetrating or condensing.
Common reasons a reading misleads:
- Plaster containing salts conducts electricity
- Foil-backed wallpaper and metal fixings distort signals
- Fresh paint or recent cleaning raises readings
A common mistake is treating one high reading as proof. It is not. A surveyor confirms with a second method before writing anything down.
Condensation Versus Damp: Telling Them Apart
Condensation is moisture from the air settling on cold surfaces. Damp is water entering from outside or from the ground. The two look similar and get confused constantly.
The clues are different:
- Condensation shows on windows, tiles and cold corners, often in the morning
- Rising damp shows low on ground-floor walls, with tide marks and salts
- Penetrating damp shows as patches after rain, often near gutters or roofs
If you are unsure which one you have, our guide on damp vs condensation walks through the differences in detail.
What a Surveyor Checks Outside the Property
The outside of your home often explains the damp inside. So a proper survey starts before the front door.
Surveyors check:
- Ground levels against the damp proof course
- Gutters and downpipes for blockages and leaks
- Roof and flashing for water ingress
A blocked downpipe can soak a wall for years without a single obvious sign indoors. Fixing it costs far less than treating the damp it caused.
A Damp Survey: What to Expect and How to Prepare
A damp survey is an evidence-gathering exercise, not a five-minute meter check. Understanding the sequence helps you judge whether the survey you receive is thorough, and helps you get more from the visit.
The inspection sequence
A competent survey generally follows the same order:
- External inspection first. Ground levels against the damp proof course, gutters, downpipes, roof covering, flashing, pointing, external wall cracks, air bricks and drainage are all checked before the surveyor steps inside. Most internal damp has an external explanation.
- Internal visual inspection. Walls, skirting boards, floors, ceilings, window reveals, chimney breasts and cupboards are examined for staining, tide marks, salts, blistering, mould and musty odour.
- Screening readings. A non-invasive meter scans suspect areas; a pin-type meter confirms readings in timber and plaster. Readings are recorded by location, not just noted as ‘high’.
- Supplementary checks. A thermo-hygrometer measures relative humidity and air temperature; a thermal imaging camera reveals cold surfaces and hidden moisture patterns; a check for plumbing leaks and ventilation performance follows where relevant.
- Follow-up investigation. Where the cause remains unclear, the surveyor may recommend a specialist test, a salt analysis, a drain CCTV survey, or invasive inspection of a wall or floor, rather than guessing.
General home survey versus specialist damp survey
A general home survey, whether a condition report, a homebuyer report or a building survey, includes a visual damp assessment and may use a meter, but it is not a targeted damp investigation.
A specialist damp survey is narrower and deeper. It focuses on establishing the cause, the extent and the appropriate remedy, and it should record where readings were taken and what they showed.
How to prepare
- Clear access to walls, skirting boards, cupboards and loft hatches
- Note where you see mould, staining, musty smells or condensation, and when they appear
- Have boiler, ventilation and any past damp treatment details to hand
Watch out: clearing mould and repainting a damp patch before a survey can hide the very evidence the surveyor needs to identify the cause, and may push the investigation towards more invasive and costly testing.
What the report should contain
Ask for a written report that sets out:
- The likely cause, named clearly, rising damp, penetrating damp, condensation or a plumbing leak
- Where readings were taken and what they showed
- The evidence behind the conclusion, including visual findings and any supplementary checks
Our guide on how to prepare for a damp survey covers the practical steps in more detail. If you are wondering about cost, read how much a damp survey costs and why ours is free.
What the Findings Mean and What to Do Next
Findings fall into three groups: cause, severity and next steps. That is exactly what your report should contain.
Ask for:
- The likely cause of the damp, named clearly
- Where the readings were taken and what they showed
- Whether further investigation is needed
Minor condensation often needs ventilation and heating changes. Rising damp or penetrating damp usually needs repair work first. Our damp proofing services cover surveys, cause identification and the fix.
Book a Free Damp and Energy Efficiency Survey
Damp rarely fixes itself, and guessing at the cause gets expensive fast.
At Home Energy Save GB, our surveys are free, our team is KIWA accredited, and we bring more than 40 years of experience to every property.
Get started with Home Energy Save GB and book your free damp survey today.
Not sure whether your damp is condensation or something more serious?
Frequently Asked Questions
How does a damp meter work?
A pin-type damp meter pushes two probes into plaster or timber and measures electrical resistance: wetter material conducts better, so lower resistance reads as higher moisture. A non-invasive meter sends a signal into the wall without pins and reads the change. Both are screening tools. They flag that moisture is present and roughly how much, but they cannot tell you whether the source is rising damp, a leaking pipe or condensation. That diagnosis comes from the surveyor’s wider inspection of ground levels, gutters and ventilation.
Can a damp meter give a false reading?
Yes. Plaster containing hygroscopic salts left by an old leak or a previous damp treatment can read high even when the wall is dry. Foil-backed plasterboard, metal wall ties and condensation on a cold surface can also skew non-invasive readings. This is why a careful surveyor cross-checks with a second meter type, a thermo-hygrometer or thermal imaging, and looks at the pattern of staining and tide marks. A single high reading is a prompt for further investigation, not a diagnosis on its own.
What is the difference between a home survey and a specialist damp survey?
A home survey is a broad condition check across the whole property, and damp is only one line of it. A specialist damp survey focuses on moisture: the surveyor traces the source, measures relative humidity and surface temperature, checks external ground levels, gutters and downpipes, and confirms whether the issue is rising damp, penetrating damp or condensation. If a home survey flags damp, a specialist survey is the next step before any treatment is priced or agreed.
How should I prepare for a damp inspection?
Clear access to internal walls, especially in corners, behind furniture and inside cupboards, so the surveyor can reach the full surface. Note when and where damp patches appear, whether they worsen after rain, and how the room is heated and ventilated. Have any previous damp reports or treatment guarantees to hand. Outside, avoid blocking the surveyor from checking ground levels, air bricks and downpipes. Photos of the problem at its worst are useful evidence, and a free survey means you can book without worrying about the cost of finding out.

